


Updated on: 2026-01-03
Choosing the right bodywork can restore your bike’s look, protect key components, and make maintenance easier. This guide explains how to evaluate materials, fitment, paint, and support so you can buy with confidence and install with care. We also walk through a simple at-home process to mount panels safely, plus answers to the most common questions. If you are considering OEM replacement fairings, you may find this checklist and step-by-step plan helpful.
Table of Contents
- Buyer’s Checklist: OEM replacement fairings
- Step-by-Step Guide
- FAQ
- Closing Thoughts & CTA
- About the Author
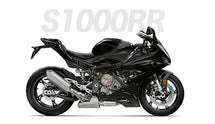
Replacing worn or damaged bodywork is a kind way to protect your motorcycle and refresh its appearance. The right panels help airflow, shield wiring, and support a clean, factory look. In this guide, you will find a practical checklist for smarter buying, a simple installation process, and clear answers to frequent questions. Whether you are returning a bike to stock style or planning a tasteful refresh, a little preparation goes a long way.
Buyer’s Checklist: OEM replacement fairings
A thoughtful checklist can make selection easier and prevent surprises. Consider the points below when comparing options and suppliers.
- Exact Model and Year Fitment: Confirm your bike’s full model code and production year. Even small revisions can change mounting points and panel shapes.
- Panel Coverage: Review what is included (upper, side, lower, tail, tank cover, fender pieces). Verify fasteners, grommets, and heat shielding are included or available.
- Material Type: ABS plastic is common for its impact resistance and flexibility. Fiberglass and carbon fiber exist, though they may require more fitting or carry higher cost.
- Wall Thickness and Flex: Balanced thickness helps absorb vibration without becoming brittle. Look for panels that flex slightly rather than crack under light pressure.
- Pre-Drilled Mounting Holes: Pre-drilled, well-aligned holes save time and reduce risk of cracking. Elongated slots in hidden areas can allow small fitment adjustments.
- Paint and Finish Quality: If pre-painted, check for multi-stage paint, clear coat depth, and even color match. For unpainted kits, smooth primed surfaces reduce prep time.
- Color Accuracy: Paint codes help, but confirm with supplier photos and customer images when possible. Light can change how colors appear; a satin or gloss clear coat can also affect tone.
- Heat Shielding: Foil-backed insulation near exhaust areas protects finish and reduces heat stress. Ensure coverage on lower panels and any areas close to headers.
- Hardware and Clips: New push-pins, bolts, and rubber well nuts can simplify the install. Reusing aged hardware may cause rattles or misalignment.
- Protective Packaging: Panels should arrive wrapped and boxed securely to avoid scuffs or warping. Ask about carrier insurance and claims support.
- Warranty and Returns: Review coverage for paint defects, warping, or fitment issues. A fair return policy shows confidence in quality.
- Installation Guidance: A simple guide or video can shorten install time. If you are unsure, a shop quotation provides an alternative option.
- Customer Support: Responsive help matters for color questions, fit advice, or order updates. You can review common answers in the helpful FAQ.
- Price and Value: Balance features, paint work, and support with your budget. Savings are nice, but consistent fit and finish often justify fair pricing.
Step-by-Step Guide
This gentle process supports a calm, careful installation at home. If any step feels uncertain, you may pause and seek advice from a trusted technician or reach out to a friendly support team via Contact.
- 1. Prepare Your Space: Choose a clean, well-lit area. Lay soft blankets or foam to protect painted panels and your tank.
- 2. Gather Tools: A screwdriver set, metric socket set, plastic trim tools, painter’s tape, microfiber towels, and a small torque wrench are helpful. Keep labeled bags for old hardware.
- 3. Unbox and Inspect: Carefully unwrap each panel. Check paint, edges, and mounting points. Gently test-fit panels on the bike to confirm alignment before full mounting.
- 4. Remove Old Panels: Photograph each step for reference. Remove fasteners methodically, placing them in labeled bags. If tight, support panels while loosening to avoid stress cracks.
- 5. Clean Mounting Points: Wipe frame tabs and rubber grommets. Replace worn rubber or clips. Clean areas behind panels while accessible.
- 6. Apply Heat Shielding: Add or adjust foil heat shield on the lower fairings and near hot zones. Ensure adhesion is smooth without gaps or bubbles.
- 7. Dry-Fit New Panels: Start with the upper cowl and side pieces. Align tabs and holes loosely. Check gaps around the tank, headlight, and tail.
- 8. Install Hardware Lightly: Begin fastening from the center outwards. Finger-tighten first. This allows small adjustments for even spacing.
- 9. Align and Torque: Once happy with gaps, snug fasteners to gentle, appropriate torque. Avoid over-tightening; it can stress the plastic and leave marks.
- 10. Add Finishing Touches: Refit mirrors, screens, and inner panels. Reinstall push-pins carefully. Remove any painter’s tape and wipe fingerprints with a clean microfiber.
- 11. Final Check: Turn bars lock-to-lock to ensure no contact. Verify indicator and headlight clearance. Take a short, safe ride to recheck fasteners afterward.
- 12. Care Routine: Wash with pH-neutral soap and soft mitts. Dry gently. Consider a quality sealant for extra gloss and protection.
Patience rewards you with a quiet, rattle-free result that looks as close to factory as possible. A measured pace, soft tools, and gentle torque are usually the keys to success.
FAQ
Do factory-spec kits fit like original panels?
Quality, model-specific kits are designed to align with factory mounting points. Pre-drilled holes, consistent panel thickness, and correct tab geometry all support a reliable fit. Small adjustments are normal during install, so lightly mounting fasteners first can help you center gaps before final torque.
Which material offers the best balance of durability and weight?
ABS plastic is popular because it is resilient, light, and cost-effective. It flexes slightly under load, which helps resist cracks from minor bumps or vibration. Fiberglass can be strong but may need more finishing. Carbon fiber is light and rigid but often more expensive and less forgiving during install.
Should I order pre-painted panels or paint locally?
Pre-painted kits save time and often arrive ready to mount. They are convenient if you prefer a standard colorway or replica scheme. Local paint is a thoughtful choice if you want custom graphics or a unique finish. In both cases, protective clear coat and careful polishing make the difference in depth and shine.
How do I care for new fairings to keep them looking fresh?
Use a gentle, pH-balanced car or motorcycle shampoo and a soft wash mitt. Rinse thoroughly to remove dust before you touch the surface. Dry with plush microfiber towels, and consider a ceramic-safe sealant for extra protection. Avoid harsh solvents and keep a soft cloth handy for quick fingerprints.
Closing Thoughts & CTA
A careful purchase and a calm installation can restore your bike’s style and make it easier to live with day to day. When you focus on fitment accuracy, paint quality, and supportive guidance, you set yourself up for a smooth experience. If you would like to learn more about a brand’s values and service, the About Us page can be a helpful introduction. And when you are ready to browse finishes, colorways, and full kits, you are welcome to explore the store at NewFairing.
About the Author
NewFairing specializes in factory-style motorcycle bodywork, fitment advice, and friendly customer support. Our team has helped many riders refresh their bikes with confidence through practical guidance and careful packaging. We hope this resource supports your next project, and we are always happy to help with questions.