


Updated on: 2026-01-03
Choosing replacement bodywork for your bike should feel straightforward and reassuring. This guide explains materials, fitment, finish quality, and installation so you can shop with confidence. You will learn what to check before buying, how to fit a kit at home, and how to keep your panels looking great for years. We also include helpful answers to common questions so you can make a calm and informed decision.
Table of Contents
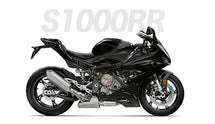
If you are comparing options for ABS injection moulded fairings, it may help to have a calm, practical checklist and a simple installation plan. Many riders value these kits for their consistent wall thickness, precise fitment, and reliable impact resistance. When the panels fit well and the paint finish lasts, your bike looks refreshed and feels secure on the road. In the sections below, you will find clear steps, gentle advice, and answers to common questions so you can decide what suits your ride and your budget.
Buyer’s Checklist (ABS injection moulded fairings)
- Material quality: Look for premium ABS plastic with even thickness. This helps panels resist cracking and maintain shape under heat and vibration.
- Moulding method: Injection-molded kits tend to offer consistent tolerances and smoother edges around mounting points and vents.
- Fitment accuracy: Confirm model, sub-model, and year compatibility. Check for pre-drilled holes and reinforced tabs that align with OEM locations.
- Heat resilience: Ask about heat tolerance near the exhaust and radiator. Quality ABS tolerates normal operating temperatures without warping.
- Paint and clearcoat: UV-stable coatings and multi-layer paint help resist fading and stone chips. Look for smooth, dust-free finishes.
- Color match options: If you want an OEM-style look, compare swatches or finish photos. Subtle differences in tone, metallic flake, or gloss can matter.
- Hardware and grommets: Many kits reuse OEM fasteners and rubber grommets. Ensure replacements are available if your originals are worn.
- Packaging and shipping protection: Good packaging (foam, corner guards, and separate wraps) reduces transit damage for complex shapes.
- Return and support policy: Read policies for damage reporting, returns, and paint issues. Responsive support helps resolve rare fit or finish concerns.
- Care guidance: Confirm recommended cleaners and polishing methods. Gentle products protect clearcoat and decals over time.
When you are ready to browse options, you may like to explore a broad range of bodywork sets here: Shop fairing kits. It can also be helpful to read about the team and approach behind the products: About NewFairing.
Step-by-Step Guide
-
Confirm exact model details. Check the model code, sub-model, and year on your V5 or owner’s manual. Small differences can change how side panels and front cowlings align.
-
Inspect the kit on arrival. Before removing old panels, unwrap each piece and check finish, pre-drilled holes, and mounting tabs. Report any transit issues promptly with photos.
-
Prepare your workspace. Choose a clean, well-lit area. Lay soft towels or a foam mat to prevent scratches. Gather tools such as Allen keys, a torque wrench, trim clips, and painter’s tape.
-
Remove old panels carefully. Work methodically, keeping fasteners grouped by section. Photograph tricky areas so you can mirror the factory routing later.
-
Transfer grommets and brackets. Gently move rubber grommets, metal clips, and any reusable brackets to the new parts. A small dab of silicone spray can help seat grommets.
-
Dry-fit major pieces first. Hold the side fairings, front cowl, and tail together loosely to check alignment. If a tab is tight, ease it rather than forcing it; minor tolerance adjustments are normal.
-
Align from front to back. Start at the nose or tank cover and move rearward. Loosely thread fasteners, then tighten gradually in a cross pattern for even gaps.
-
Check clearance and torque. Spin the handlebars lock-to-lock and inspect radiator shrouds, indicator wires, and brake hose routes. Finish by torquing to the service manual’s guidance.
-
Final inspection and test ride. Wipe the panels clean, confirm symmetrical gaps, and listen for rattles on a short, gentle ride. Re-check fasteners after the first few miles.
-
Care routine. Wash with pH-neutral shampoo and soft mitts. Avoid abrasive pads and harsh solvents. A quality spray sealant helps preserve gloss and makes cleaning easier.
If you prefer guidance from a specialist before you begin, a quick message to the team may be reassuring: NewFairing.
FAQ
How do injection-molded ABS kits compare with fiberglass or carbon fiber?
Injection-molded ABS offers reliable impact resistance, consistent thickness, and OEM-like fitment. Fiberglass can be strong but often needs sanding, drilling, or additional preparation to achieve neat gaps. Carbon fiber provides a premium look and low weight, though it is usually more expensive and can be less forgiving in minor knocks. For everyday riding and straightforward installation, ABS bodywork is a practical and balanced choice.
Will a new fairing kit affect cooling or airflow?
When panels follow factory geometry and vent placement, cooling and airflow should remain comparable to stock. Correct alignment around the radiator, oil cooler, and exhaust channels helps warm air exit efficiently. During installation, double-check that ducts and vents are unobstructed, and that wiring harnesses or hoses do not block openings. A brief test ride and a quick temperature check afterwards can provide additional peace of mind.
Can I install a kit at home with basic tools?
Many riders fit fairing sets at home with common tools and patience. Taking photos during removal, grouping fasteners by area, and dry-fitting major pieces can simplify the process. If you encounter a stubborn tab or tight hole alignment, easing the fit and re-checking the order of assembly often helps. If you ever feel unsure, a friendly note to customer support can point you in a helpful direction: Contact support.
Closing Thoughts & CTA
When you take a steady, step-by-step approach, choosing and fitting new bodywork becomes an enjoyable project. With careful model checks, patient installation, and gentle care, your panels can look and feel reassuringly solid. If you would value a curated selection and supportive guidance, you are welcome to browse here: Explore fairing kits. We hope this guide makes selecting ABS injection moulded fairings clearer and more comfortable.
About the Author
NewFairing shares practical insights on motorcycle bodywork, from material selection to installation and care. Our team focuses on clear explanations and helpful tips riders can trust. Thank you for reading, and we wish you many safe and enjoyable miles.